

Add Images Easily & Quickly
Motorcentral allows up to 20 images per vehicle, with a fast and easy method of entry.
Adding Images
To add an image to a vehicle, open a vehicle and click the Images tab.
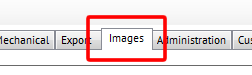
Click the Image tab from within a vehicle
Click the Add Image... button and browse to the location on your computer where you photos are located, then select the photos you wish to add.
Please Note: Motorcentral allows you to select multiple images at the same time. For multiple select techniques click here.
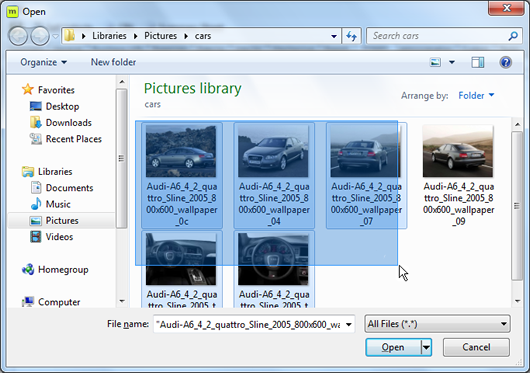
Once you have the correct images selected, click the Open button, to add them to the vehicle. Confirm the images are correct by viewing their thumbnails and click Save to save the images to that vehicle.
Ordering Images
The order of your vehicle images is important. The first (primary image), is used to represent the vehicle when only one image can be displayed (for example in vehicle listings).
Each subsequent image is then displayed in the order it is shown. If for example you are exporting a vehicle to a website that can only display six images, only the first six images will be used. With this in mind try to display the important aspects of your vehicle in the first few images leaving the latter images for details only.
To re-order the images simply select an image with your mouse by left-clicking on it, and while still holding the mouse button, drag that image over the one you wish it to go before. You will see a blue vertical line appear before the image, indicating where the image will move to. Simply release the mouse button and the image will be placed there.
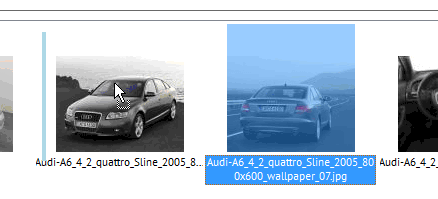
Drag the image over the top of another to place it before that image.
Deleting Images
To delete an image either select it and click the Delete button or right-click on the image and select Delete Image... from the context menu.