

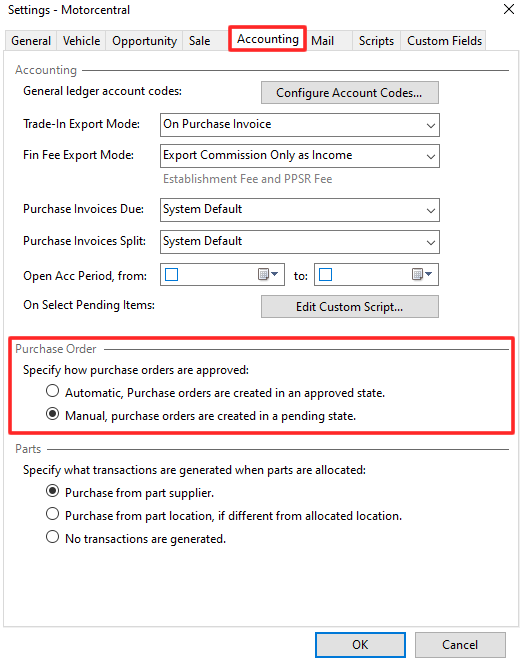
Step 1: Choose whether you would like to approve Purchase Orders automatically or manually.
Automatic - will create Purchase Orders in an approved state, so they will go straight to invoicing and will appear on vehicle expenses.
Manual - will create purchase orders in a pending state, so they have to be approved before creating an invoice or appearing on a vehicle’s expenses.
Tools > Settings
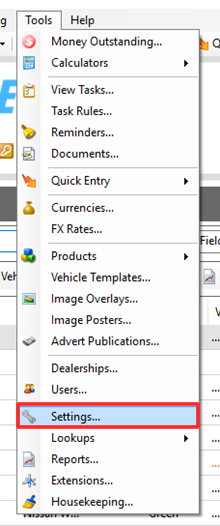
Once you have opened up settings, you will be presented with the below screen. Select the 'Accounting' tab and this is where you select 'Automatic' or 'Manual'.
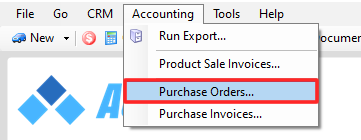
Step 2: Accounting > Purchase Orders
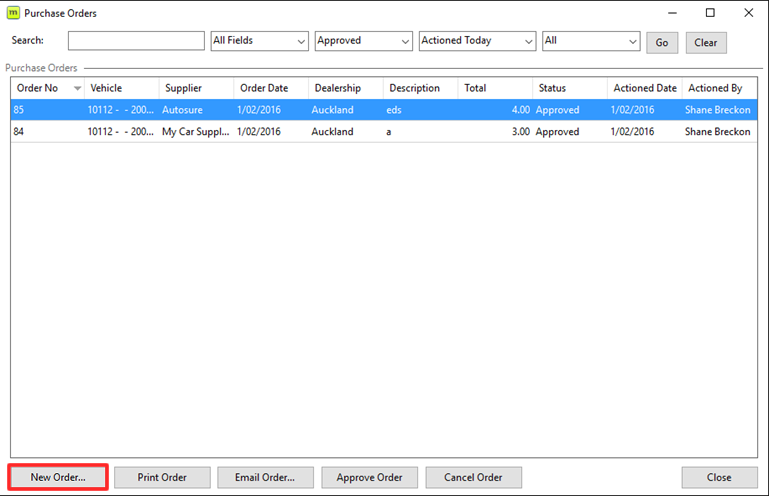
Step 3: New Order
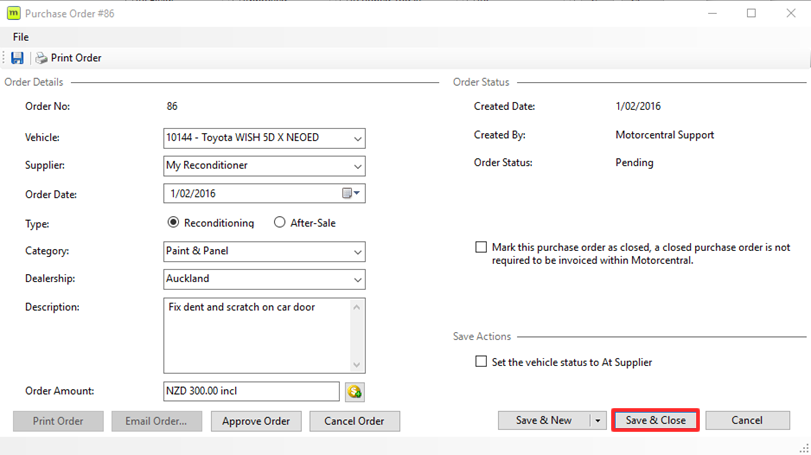
Step 4: Select the vehicle and fill out the details of the Purchase Order > Save & Close
Step 5: Approve Order
If you selected 'Automatic' in Step 1, the Purchase Order will now automatically be approved.
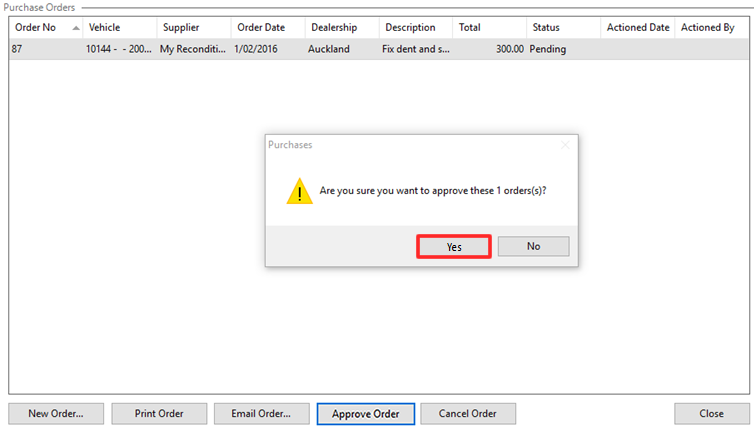
If you selected 'Manual' in Step 1, click Approve Order > Yes to change the purchase order status from Pending to Approved.
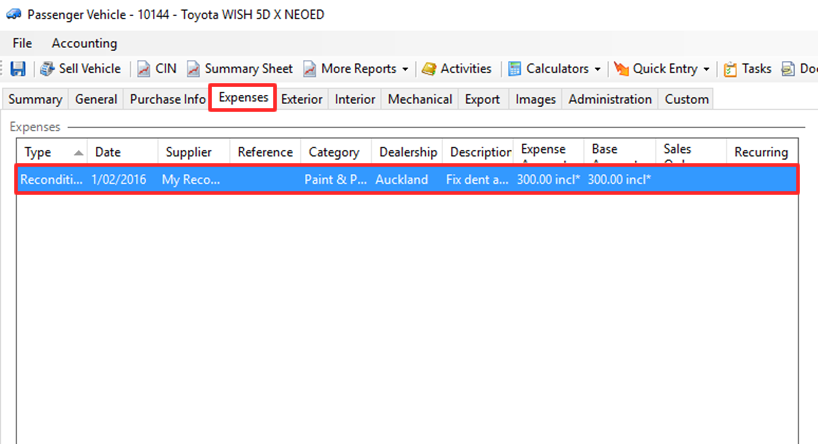
When the Purchase Order is approved, it will now show up as an estimated expense on the vehicle in the Expenses tab.
Step 6: Invoice the purchase order
When you receive the invoice from the Supplier you can then invoice the purchase order.
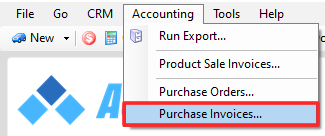
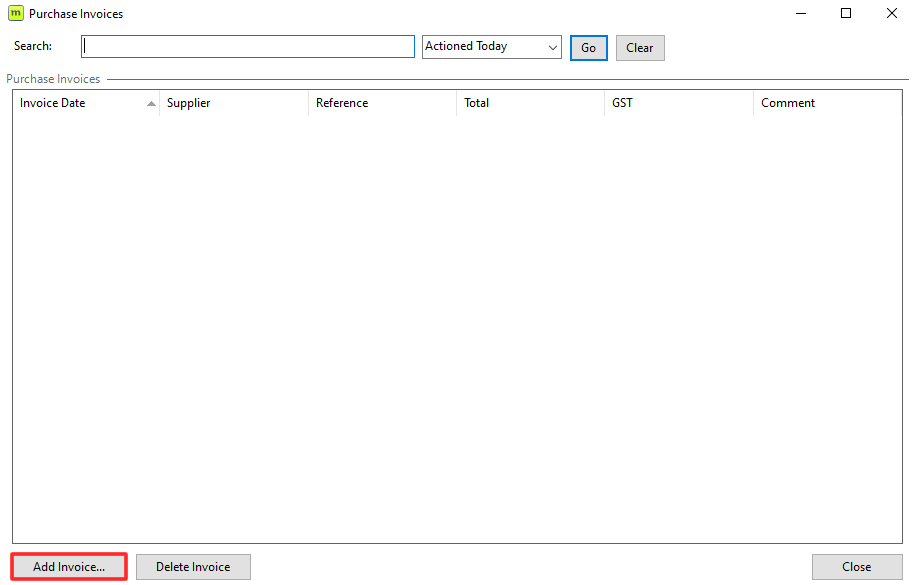
Go to Accounting > Purchase Invoices
Step 7: Add Invoice
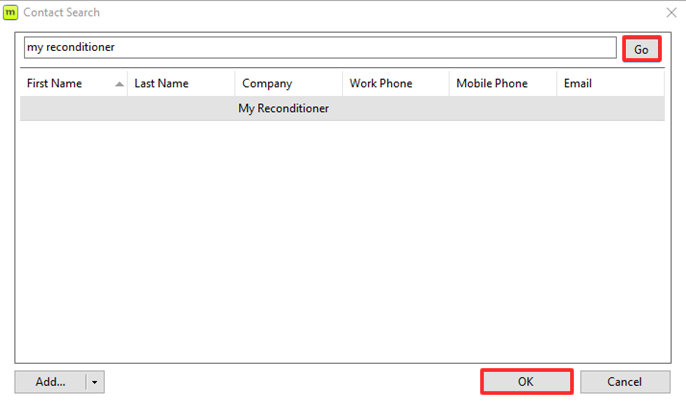
Step 8: Choose Supplier
Search for the Supplier > Click Go > Select supplier > OK
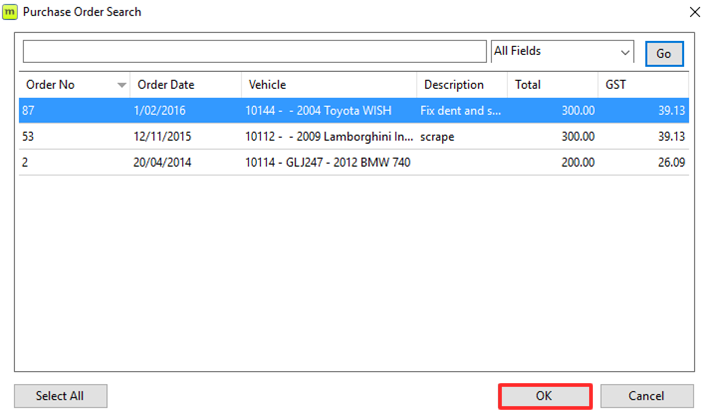
Step 9: Select the Purchase Order you want to Invoice
A list of approved Purchase Orders that relate to that supplier will now appear. Select the Purchase Order you want to Invoice and click 'OK'
Step 10: In this screen you have the chance to amend any details if needed
Once you've changed any details select 'Save & Close'.
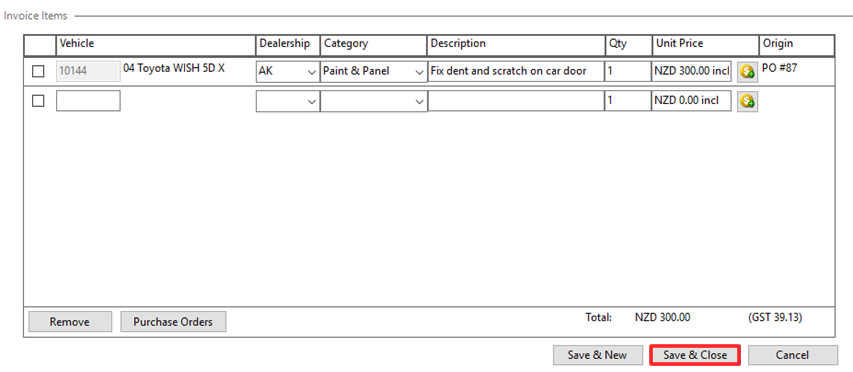
Now that the Purchase Order has been invoiced, the expense on the vehicle will now become an exact amount.

Leave a comment
Please sign in to leave a comment.