


Before completing these steps, please ensure you have obtained your email address, password, incoming mail server name (IMAP), and outgoing mail server name (SMTP) from our Support Team.
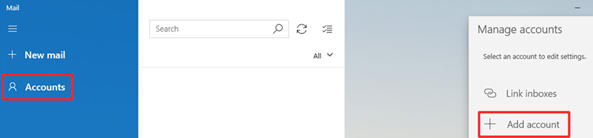
Step 1: Click Accounts > Add Account
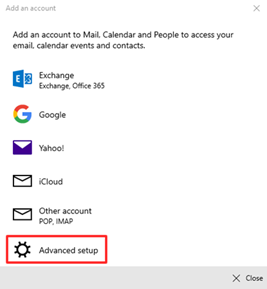
Step 2: Choose Advanced setup
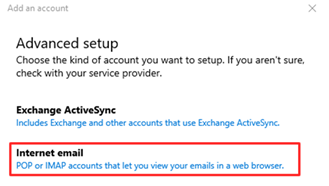
Step 3: Click the Internet email option
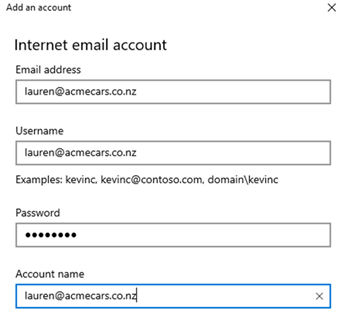
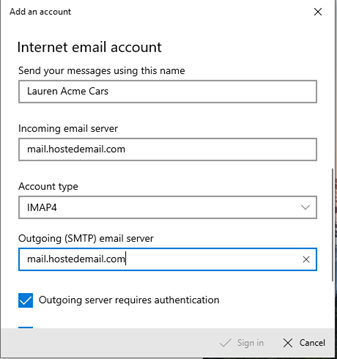
Step 4: Enter the following account details
- Email address
- Username (full email address)
- Password
- Account Name (how your account will display on Windows Mail)
- Send your messages using this name (used for your outgoing emails)
- Incoming (IMAP) email server
- Account type: IMAP4
- Outgoing (SMTP) email server
Step 5: Click Sign-in
Your account will now verify and be successfully added.
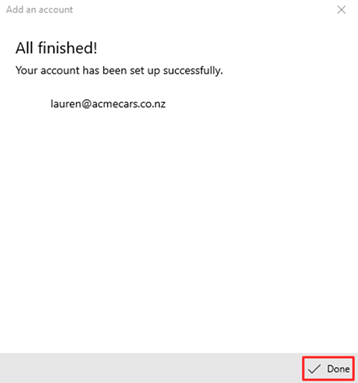
Click Done
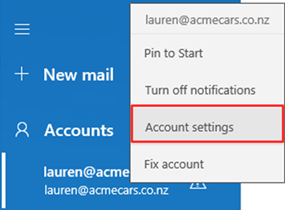
Note: If there are warnings or if your account isn’t able to sync, right click on your account and select Account Settings
Then choose Change mailbox sync settings and double check the account information you entered during steps 4 is correct.
Leave a comment
Please sign in to leave a comment.